
Elastic Waist Lounge Pants
These lounge pants are quick and easy to sew with a comfortable elastic waistband. Follow the steps below in order for best results.
Materials
-
Cut fabric pieces:
- Front leg (2)
- Back leg (2)
- Waist casing (2)
-
3/4 inch wide elastic (waist measurement minus 1–2 inches)
- Matching thread
Fabric Cutting Layouts
Use the layout that matches your fabric width.
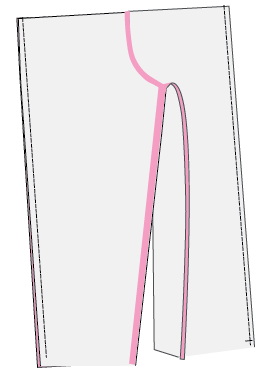
Step 1 — Stitch Inseams & Press Open
Place one front leg and one back leg right sides together matching notches.
Stitch along the inseam. Repeat for the second leg.
Finish the raw seam edges by overlock, pinking, or zigzag stithces.
Click here to learn how to finish seams.
Press seams open.

Step 2 — Stitch Crotch Seam
Place the two leg peices right sides facing together making sure that you align at the crotch seams. Then stitch the full crotch curve.
For extra reinforcement in crotch you may stitch agian right over the previous stitch line. Finish raw edges. Press seam open.
Step 3 — Stitch Side Seams
With right sides together and notches aligned, stitch both side seams from waist to hem. Finish raw edges. Press seams open.
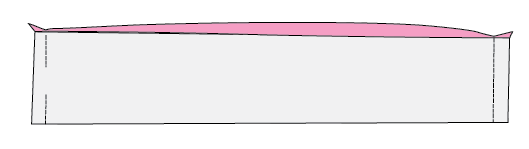
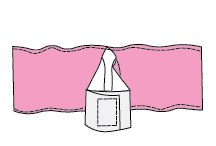
Step 4 — Stitch Waist Casing Pieces
With right sides together stitch the short ends of the waistbands to form a loop.
Press seams open.
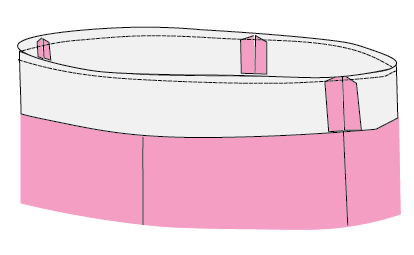
Step 5 — Attach Casing to Waist
With right sides together, pin casing to pant waist opening.
Match seams on waistband with side seams on pants.
Stitch around the waist.
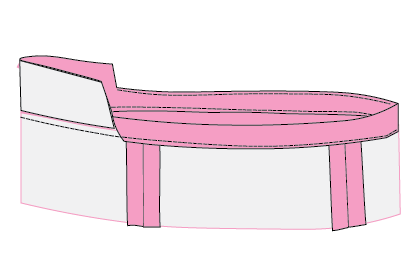
Step 6 — Press Casing Seam Up
Press seam allowance upward toward the casing. Press the top down one quarter inch and edge-stitich.
Click here to learn how to edgestitch.
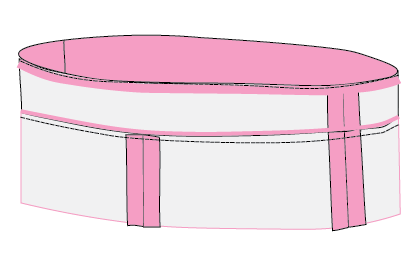
Step 7 — Turn Casing
Fold casing to inside of pants and press neatly.
Topstitch close to seam, leaving a 2-inch opening for inserting elastic. Backstitch at opening ends to prevent unraveling when inserting elastic.
Step 8 — Insert Elastic
Attach a safety pin to elastic and feed through casing.
Overlap ends and stitch securely.
Close opening.
Finished!
Give your pants a final press and enjoy your handmade lounge pants.